Bike Chain Keeps Falling Off? 8 Causes, Sorted by Where It Drops
This post contains Amazon affiliate links. As an Amazon Associate I earn from qualifying purchases, at no extra cost to you.
A chain that keeps falling off tells you what’s wrong by which edge it leaves from: off the big chainring to the outside or the small chainring to the inside means a front derailleur limit screw is set too loose (or the cage is rotated), and off the cassette into the frame or spokes means a bent hanger or a loose rear limit screw. If it drops over bumps while you’re not shifting, the chain is slapping because the clutch is off, the chain is too long, or a 1x ring lacks narrow-wide teeth. On a single-speed it’s usually slack, more than about ½ inch of play at mid-span. Each of those has a specific gap or setting to check, listed below.
Use the finder below to match your symptom, then jump to the fix. Every gap and number on this page comes from Park Tool’s repair guides or the component maker, linked where it’s used.
Chain-drop finder: match where it falls to the cause
How the finder works: each answer is the first cause a mechanic would check for that drop direction, with the target gaps from Park Tool’s front derailleur guide (1–2 mm cage height, about 1 mm limit gaps), its rear derailleur guide and its chain length and single-speed guides. It does not replace the step-by-step sections below.
Where the chain falls off, and what each spot means
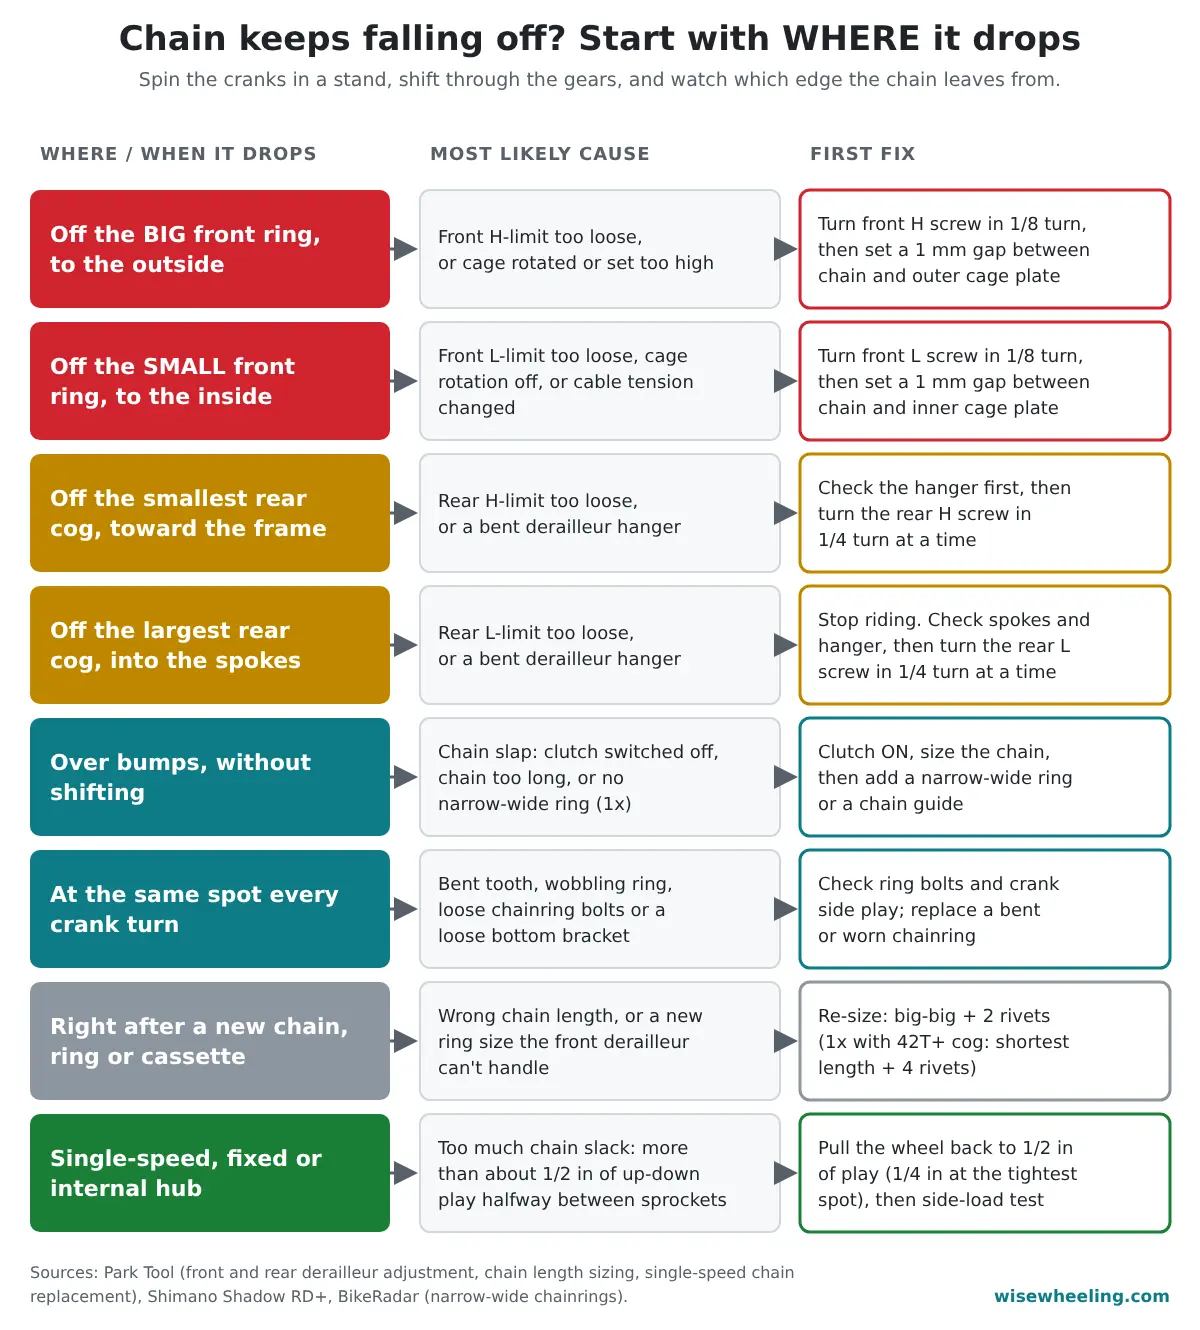
Put the bike in a stand (or have a friend lift the rear wheel), turn the cranks by hand and run through every gear on both shifters. Many drops that seem random on the road can be reproduced in the stand once you shift into the right combination. Write down the gear it happened in. Then find the row below.
| Where / when it drops | Most likely cause | When it happens | First fix | Source |
|---|---|---|---|---|
| 1. Off the big front ring, to the outside | Front H-limit screw too loose, or cage rotated / too high | Front shifts to the big ring | Turn front H screw in 1/8 turn; set ~1 mm chain-to-outer-cage gap | Park Tool front derailleur guides |
| 2. Off the small front ring, to the inside | Front L-limit too loose, cage rotation off, or cable tension changed | Front shifts to the small ring | Turn front L screw in 1/8 turn; set ~1 mm chain-to-inner-cage gap | Park Tool front derailleur guides |
| 3. Off the smallest rear cog, toward the frame | Rear H-limit too loose, or bent hanger | Rear shifts to the smallest cog | Check hanger; set rear H screw in 1/4-turn steps | Park Tool rear derailleur guide |
| 4. Off the largest rear cog, into the spokes | Rear L-limit too loose, or bent hanger | Rear shifts to the largest cog | Stop riding; check spokes and hanger; set rear L screw | Park Tool rear derailleur guide |
| 5. Off the chainring over bumps | Chain slap: clutch off or worn, chain too long, no narrow-wide ring (1x) | Rough ground, no shifting | Clutch on, correct chain length, narrow-wide ring, chain guide or catcher | Shimano Shadow RD+; BikeRadar; Park Tool chain length |
| 6. At the same point every crank turn | Bent tooth, wobbling ring, loose ring bolts or loose bottom bracket | Repeats once per revolution | Check bolts and crank side play; replace a bent or worn ring | Park Tool front derailleur troubleshooting |
| 7. Right after new parts | Chain length wrong for the new cassette or ring; ring size outside the derailleur’s range | After a chain, cassette or chainring swap | Re-size chain (big-big + 2 rivets, or 1x method + 4 rivets); check derailleur fit | Park Tool chain length; front derailleur troubleshooting |
| 8. Single-speed, fixed or internal hub | Chain slack over ~1/2 in at mid-span | Any time, often over bumps | Pull wheel back to 1/2 in of play (1/4 in at tightest spot); side-load test | Park Tool single-speed chain guide |
If your problem is the chain jumping or skipping across cogs under load while staying on the bike, that’s a different fault (usually wear or indexing). See our guide to a chain that keeps slipping. If the chain sticks to the chainring and gets dragged up toward the chainstay, that’s chain suck, covered in why a chain gets stuck on the chainring.
Check these three things before you turn any screw
Limit screws get blamed for everything, and turning them on a bike with a bent hanger or the wrong chain length just moves the problem around. Spend two minutes on these first:
- The derailleur hanger. Stand behind the bike and look at the rear derailleur. The two pulleys should hang in a straight vertical line under the cogs. Park Tool’s rear derailleur guide puts it bluntly: if the hanger is clearly bent, “your adjustments are not going to work.” A crash or the bike falling onto its drive side can bend it. Shops straighten hangers with an alignment gauge like the Park Tool DAG-2.2; replaceable hangers are specific to your frame model.
- Chain length. In the smallest ring and smallest cog, the chain should have no slack and must not rub against itself at the derailleur. In the biggest ring and biggest cog, it should still make two slight bends at each derailleur pulley. Those are Park Tool’s checks. Too long and it slaps off over bumps; too short and something gets bent.
- Anything loose up front. Grab both crank arms and push them side to side. There should be no play. Then spin the cranks backward and watch the chainring edge-on. Park Tool lists a loose bottom bracket bearing, loose chainring bolts and a bent ring among the causes of a chain that won’t behave at the front.
Chain falls off the front chainrings (2x and 3x bikes)
Front derailleurs have two limit screws, usually marked H and L. Per Park Tool, the L screw stops the cage moving toward the smallest ring and the H screw stops it moving toward the largest ring. Turning a screw clockwise (in) moves that stop toward the middle of the crankset; counterclockwise (out) lets the cage travel farther. Park adjusts front limits in 1/8-turn steps, and so should you.
Chain goes off the big ring to the outside
- Shift to the big chainring and the smallest rear cog.
- Keep tension on the cable: hold the shifter in or pull the exposed cable taut by hand (use a rag).
- Look down at the gap between the chain and the outer cage plate. Park Tool targets about 1/16 in (1 mm), checked at the tightest point as you pedal slowly.
- If there’s more gap than that, turn the H screw clockwise 1/8 turn and check again.
- Test by shifting from the next ring up to the big ring by pulling the cable by hand, not with the lever. Park’s rule: if the chain still shifts off the outside of the big ring, the H limit is too loose. If the shift becomes slow, back the H screw out slightly.
Still throwing it over the top with a correct H screw? Check height and rotation. The gap between the outer cage plate and the big-ring teeth should be 1–2 mm, “about the thickness of a penny,” and the outer cage plate should run parallel to the chain when you sight it from above. Park notes that a cage set too high can let the chain shift over the largest ring, and keeping the cage parallel minimizes the risk of the chain jumping off it.
Chain goes off the small ring to the inside
- Shift to the smallest chainring and the largest rear cog.
- Look at the gap between the chain and the inner cage plate. The target is again about 1 mm, roughly the thickness of a dime.
- If the chain drops off the inside when you shift down, turn the L screw clockwise 1/8 turn and test again, pulling the cable by hand.
- If the chain now rubs the inner cage but still drops off the small ring, stop turning the screw. Park Tool says that points to chainline or derailleur rotation instead.
One thing most guides skip: the L screw only works if the derailleur actually rests on it. If the shift cable is too tight, the derailleur never reaches the stop, and if that cable tension changes later (new cable stretching, a barrel adjuster turned), “the derailleur inner limit would also change, possibly causing the chain to fall off the rings,” in Park Tool’s words. So after replacing a cable, recheck the inner drop. A chainline that’s off (common after a crank or bottom bracket swap) makes front drops more likely too; Sheldon Brown’s chainline article explains how to measure it.
Chain falls off the rear cassette
Rear derailleur limit screws exist, as Park Tool puts it, “to prevent the chain from going into the spokes or into the frame.” Park sets them in 1/4-turn steps. Before you touch them, rule out the hanger (see above). Then:
Chain goes off the smallest cog into the frame
Shift to the smallest cog. Park’s method is to turn the H screw in until the chain starts to make noise, then back it out a quarter turn at a time until the noise stops. That puts the stop as close to the smallest cog as possible, so the chain can’t be pushed past it and jam between the cog and the dropout. If the chain then won’t shift down to the smallest cog at all, the screw is too tight or the cable is holding the derailleur inboard; see how to index a rear derailleur.
Chain goes off the largest cog into the spokes
This is the one that can hurt you and the wheel, so stop riding. Check the spokes on the drive side for gouges, the derailleur for a bent cage, and the hanger. Once those are sorted, shift to the largest cog and turn the L screw in until the derailleur shifts onto the big cog cleanly but can’t move any farther inboard; Park describes backing it out from a too-tight setting until shifts to the largest cog are no longer slow or noisy. Older bikes without a spoke protector (the plastic disc behind the cassette) have nothing to stop a chain that overshoots. Our step-by-step for a chain that fell behind the cassette into the spokes covers getting it out without damaging anything.
Chain drops over bumps (1x, mountain and gravel bikes)
If the chain comes off on rough ground while you’re not shifting, the limit screws are rarely the issue. The chain is bouncing (“chain slap”) until it climbs off the ring. Work through these in order:
- Turn the clutch on. Most modern mountain and gravel rear derailleurs have a clutch that resists the cage swinging forward. On Shimano derailleurs with Shadow RD+ there’s a stabilizer on/off switch on the derailleur; Shimano describes the system as reducing chain slap and as a solution for chain drop. Check that it’s in the ON position.
- Check chain length. A chain that’s too long keeps slack in the small cogs and slaps more. For 1x drivetrains with a 42T or larger cog, Park Tool sizes the chain by wrapping it around the chainring and largest cog without going through the derailleur, finding the shortest length that joins, then adding four rivets (2 in). Our bike chain length guide walks through it with the 2x method too.
- Use a narrow-wide chainring on 1x. A standard ring has one tooth width, so every other tooth barely touches the wider outer links. A narrow-wide ring alternates tooth widths to fill the inner and outer links, which BikeRadar says vastly improves chain retention. If you converted a 2x bike to 1x and kept an ordinary ring, this is your problem.
- Add a guide. If it still drops on rough trails, a chain guide (top guide or bash guard on mountain bikes, a 1x chain guide) or, on road and gravel bikes, a chain catcher that stops the chain falling off the inside of the small ring. A braze-on derailleur mount takes something like the K-Edge Pro Road Braze-on Chain Catcher; clamp-on derailleurs need a band-clamp chain catcher in your seat-tube size.
Chain comes off at the same spot every crank turn
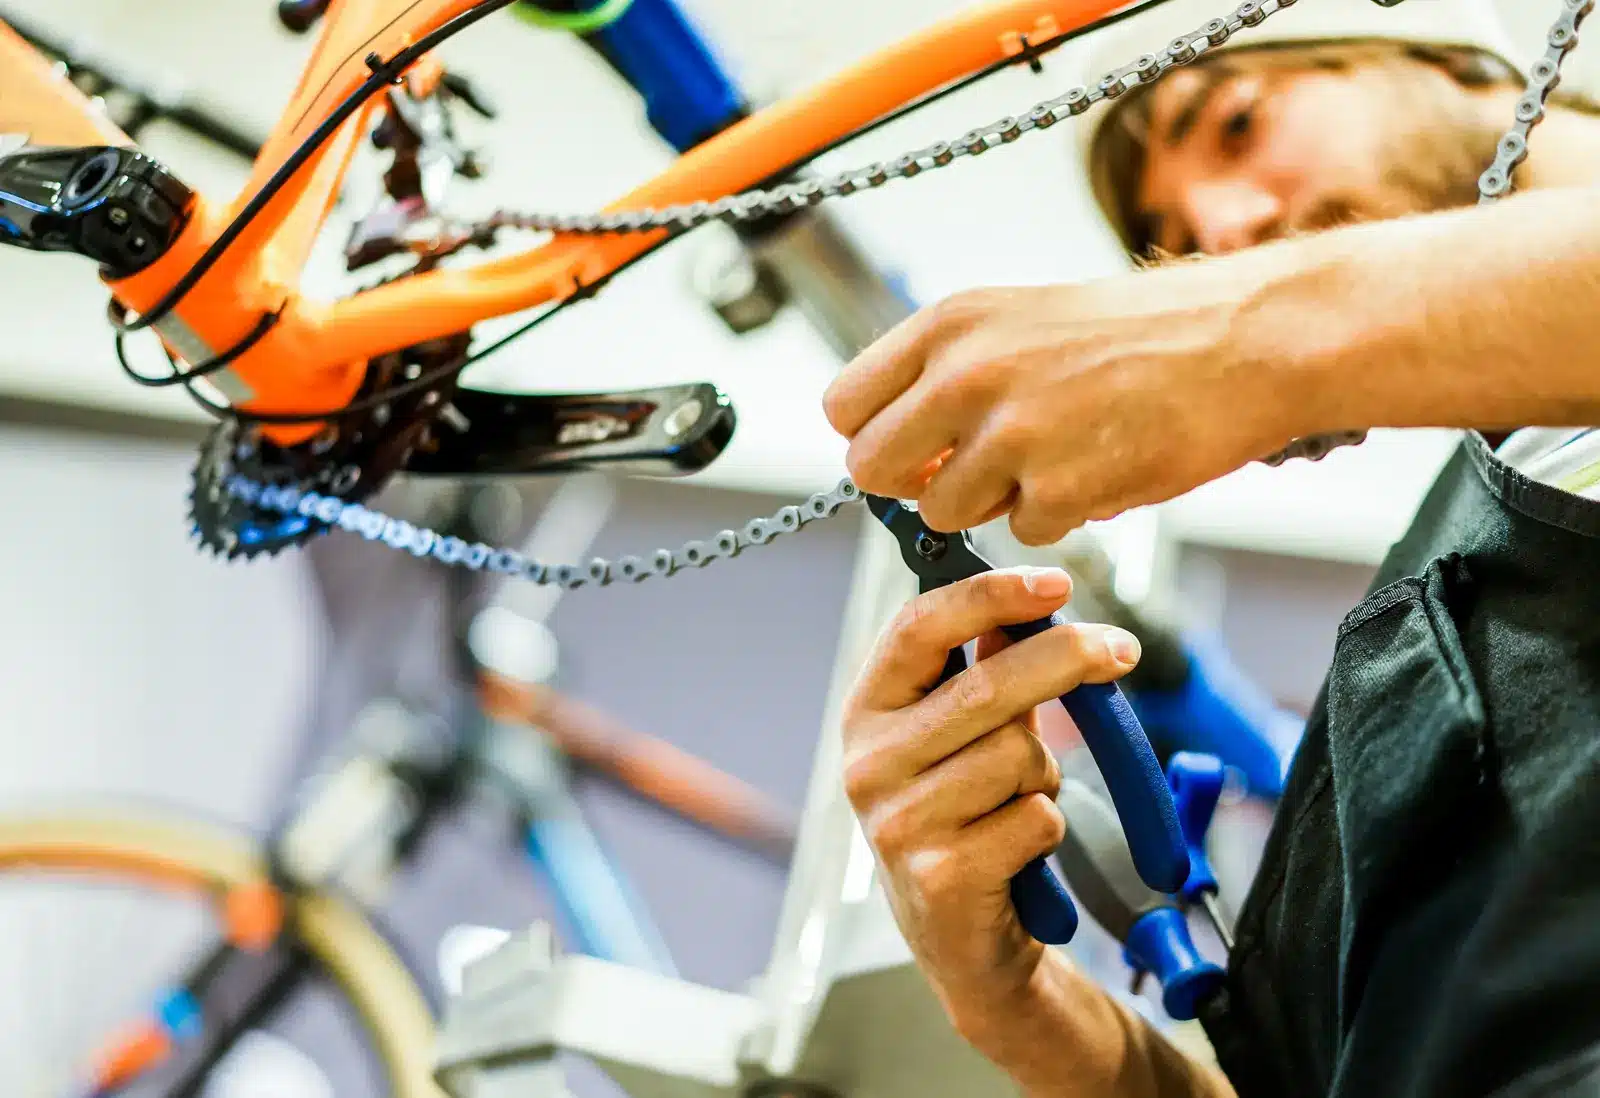
A drop that repeats once per pedal revolution points at the crank, not the derailleur. Park Tool’s troubleshooting guide covers the suspects:
- Wobbling chainring. Spin the cranks and watch the ring against the front derailleur cage or a fixed reference. First check the mounting bolts; Park notes chainring bolts need significantly less torque than a crank bolt, so use the value printed on the crank or in its manual. A bent ring should be replaced.
- Bent tooth. A tooth knocked sideways by a rock or a fall makes noise and can catch the chain. Park says it can often be bent back, and a ring missing one tooth will likely still work.
- Loose bottom bracket. Side-to-side play at the crank arms lets the ring rock. That needs a bottom bracket service or replacement with the tools for your BB type.
- Worn ring. Park notes a chain won’t engage well on a worn ring, and worn shifting ramps and pins make front shifts worse. Hooked or shark-fin teeth mean replacement.
Single-speed, fixie or internal-hub chain keeps coming off
With no derailleur to take up slack, the chain stays on only if the wheel holds it tight. Park Tool’s single-speed guide gives the numbers:
- Push the chain up and down halfway between the sprockets. You want about ½ inch of total movement.
- Turn the cranks and check at several points. If you find tight and loose spots, a sprocket is out of round (common, Park says); set ¼ inch of play at the tightest spot.
- Adjust by loosening one axle nut, sliding the wheel back, snugging it, then doing the other side, keeping the wheel centered in the frame. A bolt-on chain tensioner on horizontal dropouts makes this easier and stops the wheel creeping forward.
- Final test: push the chain sideways at mid-span. It will rattle but shouldn’t derail. If it comes off, add tension and repeat.
- Tighten the axle nuts to the bike maker’s torque. Park says it’s typically around 25 Nm (about 18 ft-lb). If the wheel keeps pulling forward under hard pedaling, the nuts weren’t tight enough.
If you run out of dropout before the slack is gone, the chain is too long. Park’s single-speed sizing is the chain pulled tight around both sprockets, plus two rivets (one inch).
The numbers that matter
| Setting | Target | Source |
|---|---|---|
| Front derailleur cage height above big-ring teeth | 1–2 mm (penny thickness) | Park Tool |
| Gap, chain to inner cage (small ring, big cog) | About 1 mm (1/16 in) | Park Tool |
| Gap, chain to outer cage (big ring, small cog, cable taut) | About 1 mm (1/16 in) | Park Tool |
| Front limit screw adjustment step | 1/8 turn | Park Tool |
| Rear H limit screw adjustment step | 1/4 turn | Park Tool |
| Chain length, 2x (largest cog 36T or smaller) | Big ring + big cog, + 2 rivets (1 in) | Park Tool |
| Chain length, 1x (largest cog 42T or larger) | Shortest joinable length around ring and big cog (no derailleur), + 4 rivets (2 in) | Park Tool |
| Single-speed chain play at mid-span | About 1/2 in (1/4 in at tightest spot) | Park Tool |
| Single-speed axle nuts | Maker’s spec; typically about 25 Nm (18 ft-lb) | Park Tool |
Tools that help
Most of these fixes need only a small screwdriver or hex key for the limit screws (check which yours take) and a set of hex keys for clamps. Useful extras, all on Amazon (check the current price there):
- Park Tool CC-3.2 chain checker: tells you in seconds whether the chain is worn before you start chasing adjustments.
- Park Tool CT-3.3 chain tool plus master link pliers: for shortening a chain that’s too long.
- Park Tool DAG-2.2 derailleur hanger alignment gauge: a shop-grade tool; worth it if you work on several bikes, otherwise let a shop straighten the hanger.
- Narrow-wide chainring: match your crank’s mounting (bolt circle or direct mount) and chain speed.
When to take it to a shop
- The chain went into the spokes and any spoke is gouged, kinked or loose.
- The hanger or derailleur cage is visibly bent and you don’t have a replacement hanger or alignment gauge.
- There’s play in the cranks (bottom bracket service needs specific tools for your BB type).
- The front derailleur cage is bent. Park Tool says re-bending one rarely works and replacement is the best option.
- Limit screws, chain length and hanger all check out and it still drops: chainline or frame alignment may be off.
FAQ
Why does my chain fall off when I shift to the big chainring?
Usually the front derailleur’s H limit screw is set too loose, so the cage pushes the chain past the big ring. Shift to big ring and smallest cog, keep the cable taut, and turn the H screw clockwise in 1/8-turn steps until there’s about 1 mm between chain and outer cage. If the screw is right, check that the cage sits 1–2 mm above the ring teeth and runs parallel to the chain.
Why does my chain fall off the small chainring onto the frame?
The L limit screw is too loose, the cage is rotated, or the shift cable tension has changed. Set the L screw to about 1 mm between chain and inner cage. If the chain rubs the cage and still drops, the cause is chainline or derailleur rotation, and a chain catcher is a sensible backup on road and gravel bikes.
Why does my mountain bike chain fall off on bumps?
That’s chain slap. Check the clutch on the rear derailleur is switched on (Shimano Shadow RD+ has an on/off switch), make sure the chain isn’t too long, and on a 1x bike use a narrow-wide chainring. A chain guide is the last step for rough trails.
Is it safe to keep riding if my chain keeps falling off?
A chain that drops off the front ring mostly leaves you coasting, but one that overshoots the largest rear cog can go into the spokes and damage the wheel and derailleur. Fix that case before riding again. Either kind of drop under a hard pedal stroke can also throw you off balance.
My chain started falling off after I replaced it. Why?
The new chain is probably the wrong length. Check it in the small-small gear (no slack, chain not touching itself) and big-big gear (two slight bends at each derailleur pulley). Also make sure the chain speed matches your cassette and chainrings.
Sources: Park Tool – Front Derailleur Adjustment; Park Tool – Front Derailleur Advanced Troubleshooting; Park Tool – Rear Derailleur Adjustment; Park Tool – Chain Length Sizing; Park Tool – Chain Replacement: Single Speed Bikes; Shimano – Shadow RD+; BikeRadar – narrow-wide chainrings explained; Sheldon Brown – chainline.

Suryashankar Dasgupta founded Wise Wheeling. He has been cycling for more than 20 years, on geared and single-speed bikes, across many kinds of terrain. His guides cover bike repair, fit and gear, and each one is checked against manufacturer manuals, Park Tool and other primary sources before it’s published. Read how guides are made: https://wisewheeling.com/editorial-policy/